What is Protocrastinator?

A Protocrastinator is a person who puts off finescale Railroad (and railway modelling) for no good reason.
Originally for me it was 1:87 (HO) scale. Problems with acquiring the bits and pieces led to extreme dissatisfaction and the project stalled. Now I've acquired an O scale boxcar and I intend investigating Proto 48 as a finescale project.

Monday, June 20, 2022

A Proto Project


Caboose X-181 “The Hutch”
Layouts need rolling stock. This layout, (whatever it turns out to be,) will need it too.  Most of the stock is planned to be re-wheeled and detailed ready to run and kit built items. Except this prototype above. Mind you, depending on the layout, it might not be used on it at all. I just have to build it.

It was known as “The Hutch”. Officially Great Northern Railway Caboose X-100/X-181. Built in the Waite Park, MN Shops in 1953. It was conceived to carry less than car loads of freight on rural branch lines. Even though it operated for over 30 years on rural Minnesota lines it must not have been deemed a success for no others were built.  

It spent most of its life on the Hutch Spur, or Lester Prairie turn, working the branch line to Hutchinson, MN. Working from Lyndale Yard through Wayzata, Mound (where the line served the Tonka Toys factory), Spring Park, St. Bonifacius, Mayer, New Germany, Lester Prairie into Hutchinson. The line was removed in the nearly 2000’s. But many remnants of the line remain. 

I myself live in one of the settlements on the route. So it’s natural to want to recreate a model of something that in it’s time was a daily visitor to the town. 

The prototype looks like a modellers “kit bash” of sorts. A caboose and baggage car on an extended chassis. That’s pretty much what it is. The underframe is from a 50’ fish belly Great Northern boxcar from the 1920’s. Standard 25’ caboose and baggage car plans were used for the construction of the body.

GNHS data sheet number 132 details the history of the car with drawings. The vehicle is also preserved and many photographs of it exist on the internet. 

It would be nice if the project could be as easy as it appears. Especially if a suitable donor caboose could be found. The lines of the prototype seem quite simple, square and perpendicular, so shouldn’t provide too much of a challenge. Now if there’s a fish belly box car, and baggage car out there too…


Monday, June 6, 2022

Versions

 The Hamon Deltak concept stuck with me for quite some time. Though I think that was mostly down to the huge machinery that came out of the premises. They are pretty fascinating. Items like these would be relatively easy to scratch build as they are all  straight edges, square corners, and in some cases, tubes. Exact measurements aren’t really needed as these are all custom made to suit the task. Just copy what you see and make to proportions fit.


The effect of seeing the items in real life translated well into the model. Look at this view below on the original Hamon Deltak APA box layout. Though this is only a test shot, set up during construction. I Feel better about this shot than many other views from completed layouts. It was so much fun to look at the photos and try to work out dimensions. I am more than a bit curious to find out what size a heat exchanger like this would be in O scale. Not just the size, the volume. In O scale these would be BIG things. 


I tried a couple of other iterations of the concept to use this piece of heavy industry I created. One used the baseboard from Wingetts recycling. But having two concepts I was keen on melded together kinda cancelled each other out. I thought it was going to be the great solution to everything but it just wasn’t.


Then there was this version. I think this one was actually going to get built, but it got cancelled when we moved house and downsized. I really liked the arrangement of the main building, the way the track curved behind it. Though the radius of curve I’d have to use in O scale would probably preclude me from directly translating this plan into O.


After these recent posts, I think you can get a fairly good idea of what I want to achieve in my small P:48 layout. Next time, we will talk about what you Americans delightfully call “Givens and Druthers”.


Saturday, June 4, 2022

Everything is happening at the same time…

 Once upon a time, back in the day. I was fond of titling blog posts with favourite, (and often obscure to most people) song titles. This song just seemed to fit today, because two O scale locomotives arrived courtesy of that well known auction site. I’d won the items over the last couple of weeks. But because of the vagaries of the postal system they both arrived today. 

First the AHM Atlas Plymouth MDT. Six wheel version.

Rear three quarter view. It’s that tank on the footplate that I love about the 6 wheelers

Front three quarter view. Horn looks a bit bent.
The weathering is nice and probably better than I could do out of the box right now. You can find these on eBay for $25. If the wheel replacement is as easy as they say. There can’t be any cheaper way to start a P:48 roster.
Next up,  a Weaver Alco RS-3. My misfortunes with the first RS-3 I purchased were documented earlier. Undaunted, I sought out the correct one. It turned out there were a plethora of them at the time I was searching. I could pick and choose. I chose this one.
The previous owner was starting on a low nose conversion
All the paint has been stripped off the body has been primed
The correct, convertible bogies.
As there were so many of them out there I looked around at the prototype and became somewhat enamoured of the low nose RS-3. Simple conversions of the regular (high nose) locomotives they were mostly used in hump yards. I expect the nose being chopped improved visibility. Some found their way into road service and one is preserved at the Alberni Pacific Railway in Canada. 
I like locomotives with character and I think the low nose RS-3 has it. Some of them, like the one preserved at the Alberini Pacific Railway look downright odd, like some weird multiple-eyed alien.  But this one  looks quite normal, and compares nicely to my unfinished model. I just need to reshape the window, add the light housing and it should look the part.
The character of the low-nose is captured well.
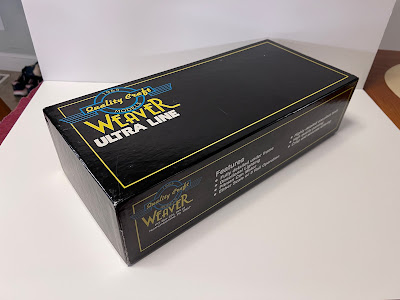
One last thing. It’s an older loco. So it came in an old box and the warning on the outside made me smile. It’s so from another time. The typeface, the wording, the emphasis in the warning. It just made me laugh.

I wasn’t really expecting all this to arrive on the same day. But it does spur me on to get a concept for the layout going and come up with a proper design.


Friday, June 3, 2022

How small a space can you get away with?

 You will have seen in these last few posts one of my basic tenets of micro model railway layout design. The desire to get a quart into a pint pot. I do not have the space in my house (or garage for that matter) to recreate class 1 railroading. Or even shortline railroads for that matter. So I concentrate on where products starts and finish their journeys. Industrial subjects. Places where things are delivered to, or dispatched from, by rail.

The layout where I pushed this to the absolute extreme was Hamon Deltak. Built in H0 scale, it was inspired by a heat exchanger manufacturer premises that I can see from my desk at work. A good few years ago  now (perhaps 2010) I witnessed several enormous heat exchangers being dispatched by rail for somewhere. 

Google Earth view of the Hamon Deltak facility

Old photo taken on a primitive digital camera of two of the huge heat exchangers

I tried to cram the essence of the facility into an APA box (a flat pack toy storage box from IKEA, about 27”x14”.  Certain elements of it worked, some didn’t. It was maybe a bit too small for what I was trying to convey, and my constructional skills were lacking for my first attempt with the box kit.

This was the entirety of Hamon Deltak 27”x 14”
 You should be able to glean the track plan from this image.
A single track runs through with a siding in each direction 

Another view of the layout in its box
The structures on the layout and the backscene were based on what I can see from my office, (to really locate things) Though not exact copies of the structures they definitely look like them. 
The important thing on the layout was the finished product, the huge heat exchangers. They had to be modelled. I think I may have made those first. They did have to fit through the doors of the factory after all. 
The model of the heat exchanger that started it all
I often think back fondly of Hamon Deltak. It wasn’t perfect by any means. But there was a lot I really liked. There was the challenge of distilling the essence of a very heavy industry into the smallest possible space, and then there was those amazing heat exchangers. They would look great in O scale. Wouldn’t they?


Wednesday, June 1, 2022

Further layout ideas

If you know me, you’ll know there’s two types of cars on American Railroads that I really like. Railboxes, (I have four different types in H0 scale and now one in O) and Coil cars. I have three or four different ones of those in H0 scale as well. So I’m always looking at ways to get both into a layout.

In the preview issue of the Micro Model Railway Dispatch I suggested a micro layout based around a small steel distributors/fabricator. Steel could be delivered in Coil cars and flat cars. Where finished products could be dispatched on flat cars in in boxcars. That sort of layout would be a win, win for me. Even better than a scrapyard layout perhaps.

Duluth Steel Fabricators was one such place. I'm very familiar with it as it's visible from I-35 when driving into my favourite Minnesota City. 

Google Earth view
As you can see from the aerial view, it was once served by rail. Although it is still quite a large structure, if modelled in low relief, I think the basic elements of the structure could be distilled into about three feet in length in O scale.
Below is the conceptual vision I had for the layout, as it appeared in The Micro Model Railway Dispatch. I delighted in throwing in some items that really located the model firmly in Duluth. The Overpass section of I-35 and the advertising hoarding. The billboard would work in H0 scale but might well be a bit too big for O scale.
A visualization of a simple version of the layout.

Explanatory trackplan. 
Spots for just two cars on the layout may not seem like much. One under cover for flat cars and Coil cars. One outside for boxcars. But moving one car out from under cover and replacing it with another when a the outdoor spot is occupied, calls for a judicious amount of car shuffling. I think this might work out in 6’ x 18”. It might be a bit cramped at that. But I hope I’d be able to fit a representation of the office side of the building, something else that would really help locate the model.
Distinctive structures help add atmosphere
Now all this puts me in mind of another layout I built a few years back. Hamon Deltak, where I tried to fit the largest industry I possibly could in the smallest space I had. That’s a story for another post.


Tuesday, May 31, 2022

You never know what you’ll find.

 Over this Memorial Day holiday I paid a visit to the Twin City Model Railroad Museum. It’s a place I used to volunteer at when I first arrived in the USA over 20 years ago, until I got a proper job. I haven’t been back much since then.

A few years ago, the museum had to move from their old premises in Bandana Square, the old Great Northern Railroad Como Shops, to a new premises a few miles away. 

The Mississippi River bluffs scene on the TCMRM Ow5 layout
The main layout is a large Ow5 layout that has featured in Model Railroader. It features a nicely detailed area based on the St Anthony Falls milling district of Minneapolis and a super Mississippi River bluffs section. 

In the years since I offered my help there, the museum has expanded and now a visit offers layouts in all scales.From Lionel standard garage to Marklin Z scale. All layouts are set up for “push button” operation. You can push a button and watch the trains run. A great feature for the kids.


A couple of scenes from the old G-Whiz gang layout that was very popular at shows hereabouts for years

LEGO models can be pretty neat, not like I used to make as a child.

While I was there, I took a look on the members sales shelves, and came across this for the princely sum of ten dollars.

Weaver Railbox “kit”
A Weaver boxcar kit. A Railbox. I like Railboxes. It’s a “kit” in the sense that you have to assemble it yourself. Much like the old Athearn “blue box” models. It’s lightly weathered and came without wheels, trucks, and couplings so I have my choice there.  I have one of these kits already, and started off improving it until my protocrastination phase set in about eight years ago. That project was going really well, and if I can remember how I did what I was doing.  I should be on to a good thing with some nice boxcars, and if not? Well, I am supposed to be modelling a scrapyard layout. So they might find themselves modelled to be waiting for the cutters torch.
I think it was a good idea to head over to the TCMRM. 


Friday, May 27, 2022

A scrapbook of Scrapyard ideas

Lots of thoughts have been buzzing through my brain since I started on the layout concept, and when ideas buzz, they really buzz. Sometimes I can’t stop the ideas from coming, they come at the most inopportune times. For example, there I am in the middle of a 20 mile marathon training run, and an idea pops into my head. Invariably it gets lost. But other times I have a sketch pad or iPad close at hand and can scribble something down that I can develop. Here’s a few pages of thoughts. They’re just thoughts, no idea of layout size has entered my head yet. When I get an idea I like then I’ll measure things out and see what space they fit into.

First idea. More Scrapyard.
This is a first attempt making the scrapyard more important. Two sidings, what is known as a tuning fork arrangement, with cassettes offstage to take individual cars for scrapping or the gondolas full of scrap or flat cars loaded with wheels. The warehouse is still in the background to receive other traffic.

Second idea. All scrapyard.
Idea 2. I got rid of the warehouse at the back and devoted all the action to the scrapyard. Operations on the scrapyard could be quite intense. This is a link to a description of a typical operating session on my first scrapyard layout. Musings of a working gate to access the scrapyard appeared… Working features are always a positive thing on a small layout.
Third idea. Getting somewhere
Idea 3. Now we’re really getting somewhere! Throw in some pictures of inspirational locales and this starts to take shape. The area marked by the red line would make a good start point. A short section of track to lay. Some simple scenic features to develop, and it could all add up to a nice photographic backdrop for models. Those double stacked boxcars for scrapping would make a great scenic feature to hide offstage exits, and might be a use for those cheap 3-Rail boxcars you can buy in Menards. Stacks of wheels, and boxcar ends holding back piles of scrap as seen in St. Cloud, MN are other features I’m keen to include.
The section marked by the red line could be started as a single baseboard to try some track laying, switch building, and some new scenic techniques to create a photographic backdrop. 
It’s a good start. I feel that this is actually worth investigating further. I should measure it up and see what area it fits in.
I’ll report back in a few days.


Thursday, May 26, 2022

A Scrapyard Odyssey

The question posed at the end of the last post is a not unreasonable one. “Why don’t I rebuild/recreate Wingett’s recycling in P:48?” It’s an idea with its merits. I had so much fun with it. It was built for exhibitions, and the viewer reaction to it was always positive. From the employees of the industry that inspired the model discussing it with me, to the gentleman at a World’s Greatest Hobby Show, who gave me his business card and told me to write up the layout for his magazine - Model Railroader. (Which to my great regret, I never did)
Wingetts Recycling as it was exhibited

It was different back then. Wingetts was built to a deadline, 7 days. It was blogged, day by day. Several times during the day. I’m not sure I could re-create that momentum and dare I say it, excitement? Working to proto standards. It might well take me a day to built a switch for example. 

The curved layout front and interested viewers

If I were to recreate it, the main purpose of the layout would be exhibiting, as always. I enjoy interacting one on one with people in the hobby at shows. These people may not have any idea about what I am presenting but I can engage them in conversation about the layout and hopefully they come away from it with something to think about. I present small/micro layouts to grab the interest of people who think they don’t have room for a model railway having seen basement filling empires in model railroad magazines. 
This time the purpose of the layout would be to show people that proto standards are attainable by average modellers. Also that proto, (and O scale) layouts can be built in a smaller space than you’d think.
I think I can certainly entertain some ideas about recreating the idea. It wouldn’t be an exact copy, scaled up but a development, another way to work on this concept. 
To a certain extent it means changing the emphasis of the first P:48 idea proposed earlier, from making the scrapyard a small part of the layout to making it all about the layout. But it worked once, so let’s see what I can come up with. 

Wednesday, May 25, 2022

Track planning a P:48 Micro (part 2) The Scrapyard

As I have already bought a locomotive suitable for being a private scrap yard loco. How should I deal with the scrap yard section of the concept? This is where the inspiration boards really come into their own. There’s so many images out there that inspire. Images that I find inspiring, you might find dull, and vice versa. This first inspiration sheet is a handful of images I found in about 15 minutes. There’s a couple of images on the first sheet that really grabbed my attention. The wheels, and the half cut up box car. The Wheels because there’s always piles and piles of wheels in a railroad scrapping yard. Once removed form the scrapped cars, they get sent away to be re-tired and can then be re-used. The cut up box car would make a great scenic view block to hide an exit offstage, a micro layout design trick to make the layout appear bigger. With some panels and doors removed it would obstruct the view of whatever passes behind it on the tracks. In this case, the scrapyard would become a sort of “ghost industry”. That’s an industry that is not on the layout but receives traffic. Cars would be pushed off scene pretty quickly with little indication of what’s going on. A fail on the “telling a story” angle. There’s a part of me that feels that wouldn’t be right and I need to see more of the scrapyard than a cut up box car and a pile of wheels,

This second sheet is some of the research pictures from Northern Metal recycling in St. Cloud, MN images that I used in my Seven Day Model Railroad project back in 2009. The layout caught the attention of quite a lot of people. Even to the extent that employees of the company who came to the Granite City Train Show in St. Cloud one year recognized the structures on the layout, and still talk to me about the layout several years later. I guess that means the layout was a success in the “distilling the essence of the location”. These employees quite happily discussed their work and shared details that helped the model develop. For instance, did you know that different weight/sized wheels were painted different colors on the axle ends to distinguish them? Orange and White are the colours in the pictures. Paint axle ends orange and white on your model scrap wheels to distinguish them.
I look at these pictures some thirteen years later and they still fascinate and interest me. Just look at those boxcar ends being used to hold back a pile of scrap metal. I would never have thought to model something like that if I hadn’t seen it myself. I learned so much from Wingett’s Recycling. It was a very successful layout. I miss it. 
I enjoyed it so much. Perhaps it begs another question. Should I recreate it in P:48? That’s a subject for another post.

Tuesday, May 24, 2022

Trackplanning a P:48 Micro (part 1)

With a convertable locomotive on its way. I thought it about time I turned my thoughts to the layout I’m going to build. It’s going to be small, as editor of the Micro Model Railway Dispatch, it could be nothing else. 
Over the years I’ve built many successful Micro layouts in a variety of scales. Nothing in O scale though. Certainly nothing in P:48 which is a whole different animal to regular O scale. Points and curvature of track work eats into valuable real estate.
There’s many trick and dodges that the clever Micro Layout designer uses to come up with a successful design, and working these into a layout concept are what makes this sphere of model railway design so rewarding to me.
I’ve built many successful micro’s over the years. So I have an idea what I’d like to incorporate. In no particular order.
1. Working features. An animated feature can help grab the viewers attention. I’ve found great success with a working wagon loading feature. Empty wagons go in full ones come out. That the viewer can see this happen brings a small layout to another level.
British Oak Working coal loader
2. Telling a story. Use the action on the railway to tell a story. On my Wingetts recycling layout, where the feature was a scrapyard. Condemned cars were hauled into the facility never to reappear. Once in a while a  gondola full of scrap or a flat car loaded with wheels would be hauled off the premises. Several times I saw people watching the layout for an extended time, and when they saw the cars loaded with scrap and wheels, a look of realization spread across their face. As a layout creator, that was a very neat feeling.
Wingett’s recycling
3. Distilling the essence of a location (or several) into one believable whole. My Purespring Watercress layout had that in bucket loads, so I was told. I get a good feeling when I know I’ve done the job right and despite its small size I knew I’d got it right with Purespring. Well, I knew I had it right with all three layouts. 
Purespring Watercress. 
In order to get that feel, I search the internet for pictures that inspire me, that may be suitable for a project. I then put these together with sketches on an “inspiration sheet”. It helps to  give me ideas on how to develop things.  Below is the first inspiration sheet for The P:48 Micro. 
Inspiration sheet number 1
It’s a rundown old warehouse district. There’s a low relief warehouse on the back scene perhaps with two spots for cars on it. On the left, the railway enters and leaves the scene through a narrow gap between structures.  Front right will be another small feature. Almost certainly a scrapyard. The purpose of the scrapyard, or whatever industry ends up there, would be to hide the sector plate that serves to save space to access the warehouse. 
First ideas rarely get adopted, I expect a lot of chopping and changing between now and when construction starts.

.

Monday, May 23, 2022

Will this be my first P:48 loco?

After eight years of inactivity things are moving with some pace. 

After finding out what was needed from locomotives for P:48 conversion. I looked around on that well known online auction site to see what there was,  and I was captivated by this Plymouth MDT.  Repainted and weathered I thought it was beautiful! The best part is it’s a six wheel chassis as well. One that can be converted to P:48. 

Was I right to think this is a beautiful locomotive?

It was the a bit more than subtle weathering that drew my attention.
The loco is a pretty primitive one with a whacking huge motor surrounded by weight in the cab as befits a loco of this age. But the previous owner looks to have done a nice job on hiding the motor. 

My itchy “bid finger” hit the button and a few days later. I won. It’s on its way to me right now.

I hope to report more when it arrives on the prairies.

Thursday, May 19, 2022

The blog won't lie down.

Well, this blog is tossing and turning like someone who can't sleep at 2:30am, (been there, done that. Last night actually). It may well be that there is another avenue available to me before I can finally put this idea to sleep again.
It concerns something I had forgotten about. This.
AHM/Rivarossi Plymouth MDT switcher
I have several of these Plymouth MDT switchers in my possession. There are 4 wheel and 6 wheel versions. The four wheel version was made by Rivarossi and the six wheel by Roco for AHM (Associated Hobby Manufacturers) in the 1960's. They were a cheap introduction to 2 rail O scale in the USA.
I was not planning to use them for O gauge, but for an embryonic 16mm scale narrow gauge project I am planning. As this other project develops, I find I have less need for these locos. Perhaps one could find its way onto this P:48 project. There are however, things that need closer inspection. Most importantly the width of the chassis block to see if it is narrow enough to take Proto wheel sets.
(... 24 hours later...)
Well, it turns out it is and it isn't. Being that these AHM locomotives have two different wheel arrangements, and as a consequence, different drive trains. One is convertible and the other isn't (where have I heard that before). The four wheeler won't convert. Well it will. But it involves turning the wheels to the correct profile in a lathe among other things. All skills and equipment I don't have. Plus, that also would go against the ethos of this layout. Which is to keep things simple and attainable by the average modeller. 
The four wheeler is in my opinion a quieter runner, and alas, my six wheeler has been sliced up to fit a 16mm scale narrow gauge locomotive. So I need to source another one. There are times when they are ten a penny on that well known auction web site.
Things could yet happen.
Don't go to sleep just yet blog.

Tuesday, May 17, 2022

As quickly as the blog woke up

 It’s back to sleep.

After being all fired up yesterday about the possibilities of a P:48 loco and layout. The blog will have to go back to sleep.

It appears that there are three different types of Weaver RS3. Two that aren’t difficult to convert and one that is very difficult. Guess which one I have? That’s right. The difficult one. I have the “China drive” made by Atlas. 

I have three options to me to get a RS3 running in P:48. I could remove all the wheels and gearing and mill the chassis blocks down a couple of millimeters to take the narrower back to back of the wheel sets. Or I could spend several hundred dollars on a scale chassis and drive system. The third option, is to sell this one and buy one that’s easier to convert. These are the options for me from experienced P:48 modellers. 


Not good news. Back to sleep Protocrastinator.

Monday, May 16, 2022

Is this the best blog title ever?

 The Protocrastinator. "One who keeps putting off finescale railway modelling for no apparent reason"

Eight years after the last post about detailing the Weaver box car kit. (Which has progressed no further in the intervening time period, by the way). Comes a new post about a purchase that will hopefully spur my Proto-modelling on again.

For those reading this blog for the first time, or have forgotten about its purpose. It was started in 2009 to detail my efforts in Proto, or finescale model railroading. Originally the project was going to be in P:87 (finescale H0) but supply problems for point work and wagon wheels caused it to stall. So I got my model railroading kicks through more immediate "open the box" means in OO, HO, Z scale, T scale and even Busch H0f. All ways of getting something running quickly. I've built some successful, popular layouts in that time but still hanker after prototype fidelity in my model making. At some point, I'll be ready to build a finescale layout that incorporates much of what I have learned in the intervening years since I started this blog. 

I am also the editor of The Micro Model Railway Dispatch. A quarterly journal for those interested in building layouts in an area of less than four square feet. So if I could build a micro layout in P:48 that would be even better. The important thing for me with this project will be to show that Proto modelling is attainable even for the most average of modellers, for that is how I see myself. 

Way back in the day, when I first discovered the compromises that all commercial model railway scales take in order to mass produce models, and that there was a true scale alternative available. I knew I needed to try it. But back then it was very daunting. Mysterious words and phrases like "Hornblocks" and "compensated chassis" were commonplace. You had to lay your own track. Things have changed over the years, and I have much more experience. but I have never made the jump to true scale fidelity. Perhaps I'm still doubting of my skills. But I will never know unless I have a go.

So, what is the new purchase I alluded to at the start of the post?

What's in the box?

This!

At the Granite City Train Show in St. Cloud MN, I found this. A 2 rail Weaver RS-3. Looking at the packing in the box and its condition, this may have only ever been in display on a hobby stores shelves. I'm reliably informed by P:48 modellers that a simple wheel replacement is possible to get it running in the Proto world. If I'm going to have a P:48 layout, then I will need a P:48 loco. This looks like a fine starting point.

I've always had a soft spot for the RS-3 as a prototype, so I was immediately attracted to it. A quick check with my "Proto-mentor" confirmed that this would be a good locomotive to start off with, and money quickly changed hands between the vendor and I. 

What's the next step? Clearly I need to re-wheel it to the correct standards. Then I will need to lay some finescale track to run it on. What comes first? It's a chicken and egg situation.

I think you can stay tuned to this blog for a while to find out what happens next.